
How to Add a Logo to Microsoft Forms: Header Image Guide
Add a Microsoft Forms logo as a picture in the form header. Open the form in its editing view, select the header, and choose Insert Image. Microsoft says the picture appears to the left of the form title. If you want to change the form’s overall background, use Style and its themes instead; that is a different setting.
This guide covers the header image steps and the checks to make before sharing the form. Microsoft Forms changes over time, so if a control has moved, compare your screen with Microsoft’s current guide to adding a picture or logo to a form header.
A header logo and a background theme do different jobs
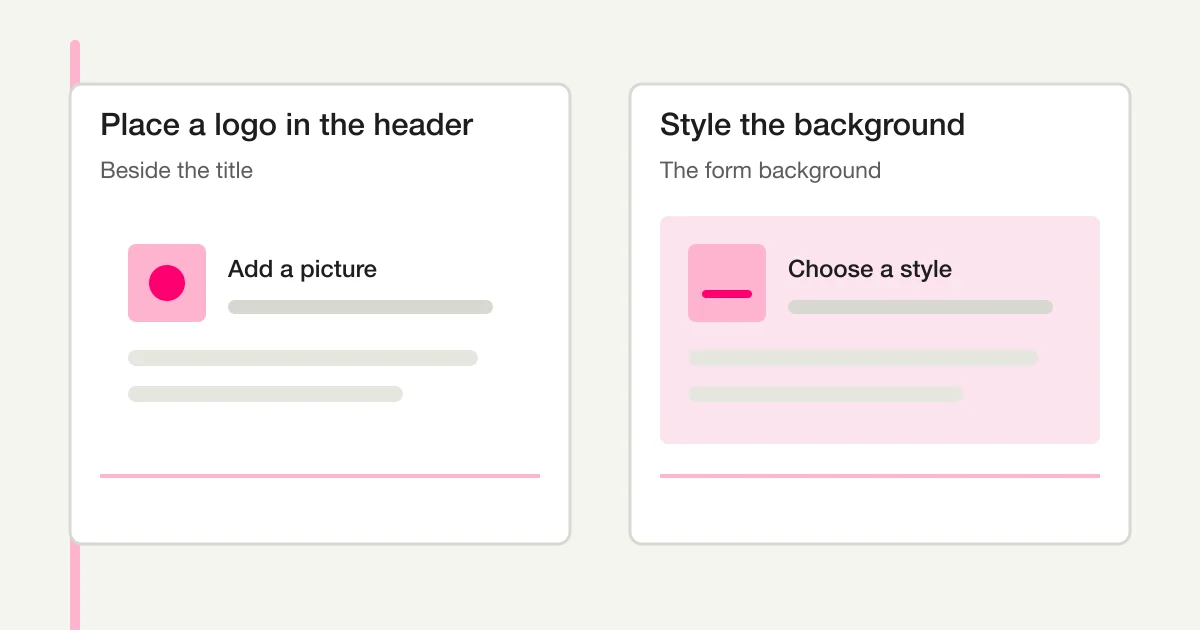
Use a header picture when the company or organization logo should sit beside the form title. Use Style when you want to change the form’s background image or color. Microsoft documents these as separate options: one guide covers adding a picture or logo to the header, while another covers themes and background colors.
| What you want to change | Setting to use | Where it appears |
|---|---|---|
| Company or organization logo | Header picture | Left of the form title |
| Overall look of the form | Style and theme | Background and form colors |
| Image that explains a question | Picture inside that question | Near the specific question |
Add a logo to the Microsoft Forms header
1. Open the editing view
Open the form in Microsoft Forms. If you are looking at a respondent link, return to the editing view. A response link lets people answer; header and theme changes are made from a form you can edit.
For a new form, create it and enter its title before adding the logo. You can also add a header picture to an existing form if you have editing access. After saving a change, revisit the respondent-facing link so you can check the public view as well.
2. Select the form header
Select the header area that contains the title and description. Choose Insert Image from the picture control shown over the header.
Make sure you have selected the header rather than a question card. A picture added to a question appears beside that question; it does not serve as the logo next to the form title. Start from the header when you want a picture or logo beside the title.
3. Choose the image
Microsoft lists these ways to add an image:
- Image Search: Find an image through Bing and add it.
- OneDrive: Choose a picture stored in your OneDrive folders.
- Upload: Select a file from your computer or device.
For an organization logo, use an image that you are allowed to use and share. Finding an image online does not automatically grant permission to reuse it. Microsoft notes that people who choose online images are responsible for respecting copyright; its help page describes a license filter in Bing Image Search.
After you select the picture, Microsoft says it appears in the header to the left of the form title. Rather than assuming a particular size or crop, inspect the actual preview and adjust the image if the title or logo is hard to read.
4. Preview computer and mobile layouts
Before sharing the form, select Preview, then choose Computer and Mobile. Microsoft’s form-creation guidance describes both preview options.
Check each view for the following:
- The logo and form title are both readable.
- The picture does not cover the title or description.
- Important text or details in the logo remain recognizable on mobile.
- Instructions and other context near the header are still easy to find.
These are editorial checks of the form preview. Actual readability depends on the image and the device. If another person will respond to the form, ask a colleague to review the preview and make any needed adjustment before distributing the link.
Ask a second person to review the header
The form owner may already know what the logo means, which can make a crowded or unclear header harder to notice. If the form is important to an event or customer process, ask someone who has not edited it to review the two previews. Give them a specific task: read the title, identify the organization shown by the logo, and find the first instruction. Their feedback can reveal whether the header makes sense to someone who has not seen the form before.
Keep this review focused on the picture and the surrounding text. It is not a substitute for checking the respondent link, choosing the audience, or confirming any settings that control responses. A form can look polished in Preview and still need a separate check of its sharing and response settings. For general Microsoft Forms creation, sharing, and results, use the Microsoft Forms survey guide.
Replace or remove a header image
To replace a logo, select the current header picture and remove it with the delete control. Microsoft’s help describes selecting the header image and choosing the trash icon. Then select the header again, choose Insert Image, and select the new picture.
After changing or removing the picture, preview the form again. Removing the image leaves the title in the header, so confirm that the form still looks the way you intend. If you may need the original file later, make sure you know where it is stored before removing it.
Change the background instead
If you want to change the overall background rather than add a logo, open Style. You can choose a theme from the gallery; Microsoft also documents custom background images and colors. The exact appearance depends on the theme you select, so preview the form after changing it.
Keep the logo and the background separate when the logo needs to sit beside the title. An image used as a background may look different across themes. To place the logo in the header, add it there rather than relying on the background image.
If you use Google Forms as well, remember that its theme and image controls are different. Do not assume that the Microsoft Forms steps are the same in both products.
Decide which picture to use before editing
Choose the image before you open the picker. That makes it easier to tell whether you are adding the organization logo or changing the form’s background. Use these checks to make the decision in advance.
Confirm that you can use the image
For a company or organization form, use the approved logo file if one is available. If a partner or designer supplied it, check that the permission covers use in a form. Microsoft also warns that you are responsible for respecting copyright when you choose an online image through Image Search. Search results do not automatically grant permission to reuse the image.
If you choose a file from OneDrive or your device, verify the filename and preview so that an outdated or alternate logo is not selected by mistake. Forms’ image picker can look similar whether the picture will be used in a header or another part of a form; first select the location where the picture should appear.
Separate branding from the form’s purpose
The logo identifies the organization. The title and description explain what the form is for and who should respond. Keep those jobs separate. A logo rarely explains whether the form is a registration, feedback survey, or request intake, so state the purpose in the form title or description as well.
After the image is added, review the header as a whole. If the title is long, check whether it remains easy to understand beside the picture. If the logo contains small lettering, inspect the mobile preview carefully. These are editorial checks rather than product requirements from Microsoft.
Decide whether a theme change is needed
If the logo should sit beside the title, add it to the header. If you want a custom background or color scheme, open Style and choose a theme. You can use both settings, but review the preview after each change so you can tell which adjustment affected the result. Microsoft’s theme guide describes the background image and color options.
If the logo is missing or appears in the wrong place
Start by checking where you added the picture. If you selected a question card instead of the header, the picture will appear with that question. Return to the editing view, select the header, and confirm that the picture is attached there.
Next, confirm that you are not looking only at a respondent link. A respondent can fill in the form, but the edit controls are available to someone who owns or can edit the form. Open the form from the editing view and check the preview again.
If the image came from OneDrive, make sure you selected the intended file. If you uploaded it from a computer or device, check that you chose the current logo rather than another version in the same folder. After replacing the picture, reopen the preview so that you are checking the current edit rather than an earlier view.
The controls visible in Microsoft Forms can vary by account and organization settings. If an image source or edit option is missing, check with your Microsoft 365 administrator and compare the interface with Microsoft’s current help. Do not use a background image as a workaround when you specifically need a picture beside the title; verify the available header controls first.
The image picker does not show the source you need
Microsoft lists Image Search, OneDrive, and Upload as ways to select a picture. If the option you expected is not available, check whether you are editing the header and whether the correct account is open. You can use another listed source if the approved logo file is available there. Do not move a work logo into a personal storage account solely to work around an organization restriction; ask the administrator which approved location to use.
Microsoft’s help says the header picture appears to the left of the title. If you cannot find another placement control, check that documented position in computer and mobile previews. If the form must follow a specific brand layout, confirm that the current editor supports it before distributing the link.
If you are starting from a copy of another form, also check its name, audience, settings, and response link before sharing. Our Microsoft Forms copy and duplicate guide explains those checks. For the broader creation, sharing, and results workflow, see the Microsoft Forms survey guide.
Frequently asked questions
Does adding a logo also change the background?
No. The header picture and the background theme are separate. The logo goes in the header; background colors and pictures are configured through Style and its themes.
Can I use a picture that is not in OneDrive?
Microsoft’s help lists Image Search, OneDrive, and Upload from a computer or device. The options available on your screen may depend on account or organization settings. Check the current Microsoft help and your administrator’s instructions if they differ.
Can I choose where the logo appears?
Microsoft’s help says a picture added to the form header appears to the left of the title. If you do not see another position control, check the preview rather than trying to position the logo with a background image.
Microsoft references
If Microsoft Forms’ themes cannot meet your visual or operating requirements and you want to compare another service, review FORMLOVA’s features and workflow separately. FORMLOVA is a different service from Microsoft Forms. You can try FORMLOVA for free by creating a new form.
Disclosure and Verification
This guide is based on Microsoft’s public help pages reviewed on October 14, 2026. I did not test the steps in a signed-in Microsoft Forms account. Button names and available features can differ; check Microsoft’s current help and your organization’s guidance if your screen looks different. The preview checklist is an editorial recommendation.