
How to Collect Email Addresses in Google Forms: Verified vs. Responder Input
To collect email addresses in Google Forms, open Settings → Responses → Collect email addresses. Choose Verified to collect a signed-in Google account address, or Responder input to ask people to enter their contact address.
The useful question comes before the setting: do you need an account address, or an inbox where the participant wants to receive information? Those can be different. A person registering for a business event might use a personal Google account in their browser but want event details sent to work.
Choose the collection mode around the address you need
| Decision | Verified | Responder input |
|---|---|---|
| Address collected | The signed-in Google account address | An address entered by the respondent |
| Google sign-in required by this collection mode | Yes | No |
| Address ownership | Account-based collection | The entered address is not ownership-verified |
| Useful starting point | Linking a response with an account | Asking for a preferred contact inbox |
| Key check | Is the intended account being used? | Does the field explain which inbox to enter? |
Google's email collection explanation makes the distinction between account-based collection and manual input explicit. An address that looks correctly formatted is not, by that fact alone, an inbox controlled by the respondent.
Also, choosing manual input does not guarantee that the entire form is open without sign-in. Access restrictions and other settings can add separate conditions. Keep the collection decision and the access decision visible in your review.
Set up email collection in Google Forms
The following path follows Google's response management documentation:
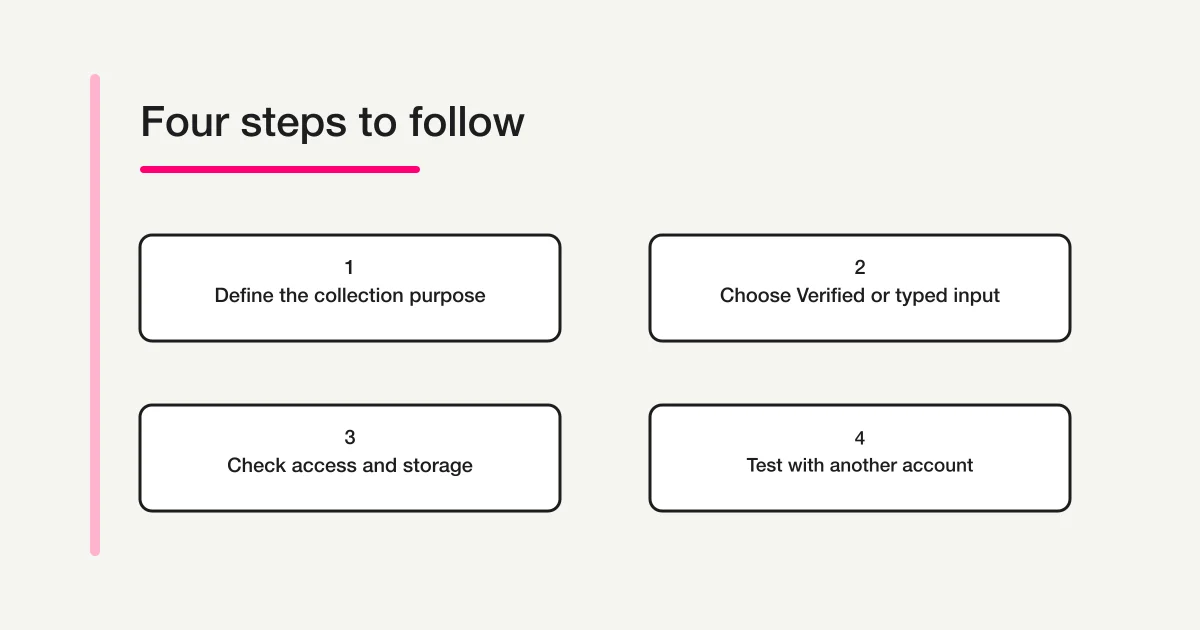
- Open the form you want to edit.
- Open Settings at the top.
- Expand Responses.
- Under Collect email addresses, choose Verified or Responder input.
- Preview the respondent experience and read the account notice or contact-field instructions.
Check whether you have also added a separate short-answer question called “Email address.” A normal question and the built-in collection setting should not be treated as interchangeable without reviewing how you will use the results.
If both fields ask for the same inbox, consider whether the second is necessary. If they serve different purposes, label those purposes directly. “Account address” and “Email for event updates” tell the organizer more than two columns with almost identical names.
If the setting is missing, first confirm that you opened the editing view rather than the respondent link. For a work or school form, check your editing permission and the organization's requirements. The end of this step is a clear respondent experience, not simply finding a familiar label in the editor.
Email collection also does not, by itself, create the event message you want to send. Response copies and custom acknowledgment emails are separate decisions. If that is your next task, read the guide to response copies and automatic replies after choosing the collection mode.
Collect work email without confusing it with Google sign-in
Consider a public workshop for customers and partner companies. You want an address that someone will check before the event. One participant uses a personal Google account, another uses a company Google account, and a third does not normally use Google services.
The organizer's requirement is consistent: an appropriate contact inbox. The participants' browser accounts are not. That is why the mode should follow the operational requirement rather than the account you happen to see while testing as the owner.
| What the registration needs | Design consideration | Example instruction |
|---|---|---|
| A reachable preferred inbox | Consider manual contact input | “Email address for workshop updates” |
| A response associated with an organizational account | Review account collection and respondent access together | “Use the account specified in your organization’s invitation” |
| An account address plus a different contact inbox | Ask for a separate contact only when needed | “Enter a different address here if updates should go elsewhere” |
Do not interpret the word “Verified” as proof of employment or event eligibility. Decide separately what establishes eligibility, who reviews it, and what happens when the account and application details do not match.
Equally, do not require a company domain just because the event is professional. Freelancers, contractors, and invited speakers may use another inbox. If those people should attend, an inflexible address rule can conflict with the actual audience.
A useful field description explains what will arrive. Here is an editorial example for an event, to adapt to your real process:
We use this address for joining instructions and schedule changes. Enter an inbox you can check before the event. If you want updates at work, enter your work address.
This helps a respondent choose a destination intentionally. Keep additional information requests tied to the same purpose. If job title or company size is unnecessary for organizing the session, collecting a contact address is not a reason to add them automatically.
Decide which stored field becomes the contact destination
After a controlled test response, review the owner's response view and the linked spreadsheet if you use one. Finding an address somewhere is not the whole check. You need to know which field the person preparing the event email will use.
| Place to review | Question to answer | If the result is unclear |
|---|---|---|
| Respondent view | Which account or contact did the person see? | Revisit the collection choice and field instructions |
| Owner's response view | Is the expected address attached to this test response? | Match the timestamp and test answer before comparing |
| Linked spreadsheet | Can you distinguish the collection field from a custom contact question? | Define the destination column and remove ambiguous labels |
| Organizer's working process | Can the person preparing updates identify the correct destination? | Align manual lists and any existing script with that decision |
For example, a sheet might contain “Email address” and “Contact email.” Choosing the first column automatically could send information to an account the participant did not intend for event communication. Write down the field's purpose before building a mailing list from it.
Repeat that check after a question is added, renamed, or moved. A visible label change does not prove that an existing operational process now reads the intended field. Ask the person who will send the information to point to the exact source they will use.
These are address-selection checks, not delivery tests. A plausible-looking address can still be mistyped or belong to someone else. The response validation guide covers input rules. If a message has already failed to arrive, use the automatic reply delivery guide for that later stage.
Test another account and a signed-out session before distribution
An owner who stays signed in may see a smoother path than the actual audience. Plan a controlled test using an account different from the form owner's account, then inspect the signed-out experience as well. Use a test form or a managed test window before collecting real applications.
| Test condition | With Verified collection | With Responder input |
|---|---|---|
| Open as a different Google account | Check that the intended test account is shown | Check that the intended contact inbox can be entered |
| Open while signed out | Confirm that the sign-in requirement is understandable | Check whether another setting still requires sign-in |
| Inspect the submitted test as the owner | Compare the stored account address with the expected one | Compare the entered contact with the stored value |
Google's publishing and sharing documentation explains that Limit to 1 response is a separate sign-in condition. If you chose manual collection but still encounter login, inspect that setting and respondent access before changing the email field again.
Review the audience allowed to answer and whether response summaries are exposed. A registration form collecting contact details should not enable results sharing casually. Test the route a participant will receive, rather than relying only on the editing view.
Record what each test established. “The form opened,” “the response was stored,” and “an email arrived” are different observations. If your test only covered the first two, leave delivery unconfirmed. Finally, mark or handle test records so they are not mistaken for real attendees when you prepare the event list.
Draft an event contact form with FORMLOVA
If your task is to collect a participant's chosen contact address, you can also explore a draft built around that requirement in FORMLOVA. FORMLOVA lets you create and operate forms through a compatible AI chat.
The following prompt is a design example, not a command already executed or an observed product response. It focuses on one small registration form and stops before publication or outbound messages.
Create an unpublished event registration draft. Ask for name, email address for joining instructions, and preferred session. Make all three required. Use an email-type field for the contact address. Offer Morning and Afternoon as a single-choice session question. Add this email description: “We use this address for joining instructions and schedule changes. Enter an inbox you can check before the event.” Do not configure automatic replies or send anything externally. Stop after showing the fields and description for preview review.
Here is the proposed review table to compare with the draft, rather than a transcript of an actual result:
| Field | Proposed design | What to review |
|---|---|---|
| Name | Required short text | Does the label explain which name the reception team needs? |
| Joining-instructions email | Required email type with a purpose description | Can the participant choose the right inbox? |
| Preferred session | Required single choice: Morning or Afternoon | Do the choices match the actual event schedule? |
The email field's format validation is not Google's Verified collection. It does not prove ownership of the inbox or guarantee delivery. Review the draft with that boundary in mind instead of presenting the two services as equivalent account-verification mechanisms.
Form creation, publication, response collection, response search, and CSV export are available on the Free plan. Respondent automatic replies require Standard or above. This example intentionally stays with form fields and their explanation so you can review the contact design before considering message automation.
Draft an event form with a clear contact field
Create a free draft with name, contact email, and session choice, then review the email instructions before publication.
Sign up free to draft the registration form
Register, verify your email, and connect a compatible AI chat. Send the prompt above and review the unpublished draft. Publication requires a separate review. The AI client's connection requirements, permissions, and costs are separate.
Frequently asked questions
Can I just add an email question?
You can ask for an address as an answer, but review a normal question separately from the built-in collection setting. Decide which field you will retain and use as the contact destination. Avoid two unexplained fields asking for the same thing.
Does Verified automatically collect a work address?
It follows the Google account used for the response. If you need a work contact, confirm whether that is the appropriate account address or whether the form needs a clearly labeled separate contact field.
Will changing the setting add addresses to earlier responses?
Do not assume that changing a setting recovers contact information you never collected. Separate responses received before and after the change, and inspect what the existing records actually contain before preparing an audience from them.
What if I want an anonymous form instead?
That is a different collection objective. Follow the anonymous response settings guide, which examines more than the email collection setting alone.
Your next check
Before distributing the form, write down three things: the address you need, the collection mode you selected, and the stored field you will use for follow-up. If they describe the same purpose, your settings and operating process are easier to review together.
For the larger process around notifications, spreadsheets, and ongoing handling, continue with the Google Forms, Sheets, and Apps Script operations guide.
Official sources
- Google: View and manage form responses
- Google: Collect respondents' email addresses using Google Forms
- Google: Publish and share your form with responders
Disclosure and Verification
Google's official instructions and FORMLOVA's current product and plan definitions were reviewed on October 16, 2026. No Google form settings were changed and no responses were submitted for this article. The operating tables describe checks to perform; the FORMLOVA prompt and field table are design examples. The author develops FORMLOVA.