
Last updated: April 28, 2026
Searching for a form creation guide often leads to a pile of templates.
Contact form template. Lead capture form. Webinar registration form. Event registration form. Job application form. Survey form.
They all look like "forms," but they should not be designed the same way.
A contact form needs reply context and routing categories. A lead capture form needs resource delivery and sales follow-up. A webinar registration form needs confirmation emails and reminders. An event registration form needs capacity, waitlists, and check-in lists. A job application form needs job-related information without collecting unnecessary candidate details. A survey form needs questions that can be analyzed after responses arrive.
So the first question is not "Which fields should I add?"
The first question is: what should happen after someone submits the form?
This guide is the parent page for FORMLOVA's form creation cluster. Use it to choose the right use-case guide, decide your minimum fields, and connect the form to auto-replies, response status, CSV exports, and Google Sheets.
Start by Choosing the Form's Job
You can create input fields quickly.
The harder part is the workflow after submission.
Who reviews the response? Who gets notified? What does the respondent receive? Should the team track status? Should responses be exported once or synced continuously? Should unsolicited sales messages be separated from real inquiries?
Use this table to pick the right starting point.
| What you want to build | Start here | Main design questions |
|---|---|---|
| Decide fields and required/optional rules | Form Field Examples Guide | Required fields, optional fields, ask-later fields, field types |
| Improve abandonment and conversion | Form Conversion Optimization Guide | Field count, required settings, errors, thank-you page, clean analytics |
| Website contact form | Contact Form Template | Required fields, categories, privacy notice, response timing |
| Registration forms broadly | Registration Form Guide | Registration type, confirmation email, status management, reminders |
| Reservation, booking, or appointment requests | Reservation Form Guide | Preferred times, confirmation rules, cancellation/rescheduling, status. For Google Forms, read How to Make a Booking Form in Google Forms |
| Resource download or lead capture | Lead Capture Form Guide | Conversion, resource delivery, qualification, sales follow-up |
| Webinar or seminar registration | Webinar Registration Form Guide | Confirmation email, join link, reminders, attendee list |
| Offline or hybrid event registration | Event Registration Form Guide | Capacity, waitlist, check-in, post-event follow-up |
| Hiring or job application | Job Application Form Guide | Job-related fields, candidate communication, hiring status |
| Customer or event survey | Survey Form Guide | Question design, segmentation, open-ended answers, actions |
If your use case does not fit one of these, start with ChatGPT Form Builder Guide. It shows how to begin from a short prompt and improve the draft after previewing it.
The Same Field Means Different Things in Different Forms
A common mistake is reusing the same field list everywhere.
Name, email, company, phone, message.
That can produce a form, but it rarely produces a good workflow.
| Field | Contact form | Lead capture | Webinar or event | Job application | Survey |
|---|---|---|---|---|---|
| Company | Useful for B2B context | Lead classification | Badges, check-in, follow-up | Less important than role fit | Segment only if needed |
| Phone | Usually optional | Optional for consultation | Useful for urgent event changes | Depends on process | Usually unnecessary |
| Category | Routing | Requested resource | Ticket or attendance format | Role applied for | Segment |
| Long answer | Message | Problem or interest | Pre-event question | Experience summary | Reason behind rating |
| Consent | Response and records | Resource delivery vs marketing | Event communication | Hiring process | Anonymous vs follow-up |
Phone is a good example.
It may create friction on a contact form. But for an offline event with same-day changes, it can be operationally useful.
Company is similar. It may be optional on a general contact form, important on a B2B lead form, and mainly useful for badges or follow-up on an event form.
The lesson is simple: never add a field only because it appears in many templates. Add it because the current workflow needs it.
The Five Decisions Every Form Needs
Different forms still share the same foundation.
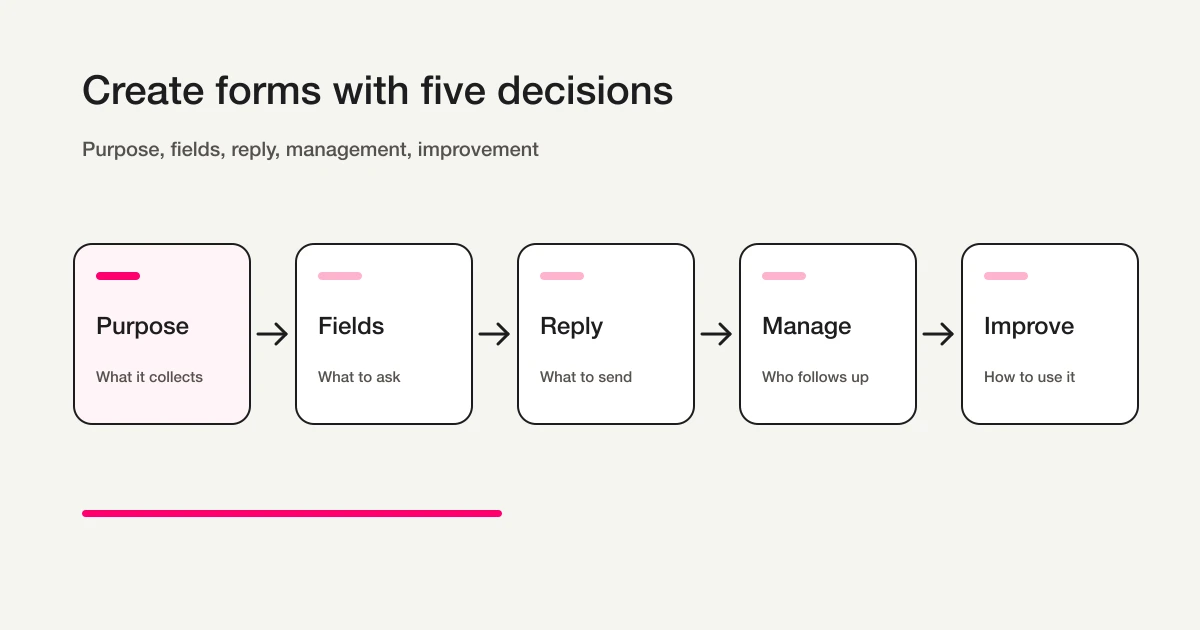
The first decision is purpose.
Is the form for contact, registration, resource delivery, hiring, or feedback? If the purpose is vague, the fields and auto-reply will be vague too.
The second decision is fields.
Name, email, company, category, message, consent, timeline, attachment, rating, and comments all have different jobs. Make a field required only when the respondent can understand why it is needed.
The third decision is reply.
Should the respondent receive an auto-reply? If yes, what should it include: receipt, response timing, a resource link, an event URL, a cancellation note, or a support contact? For examples, see Form Auto-Reply Email Examples.
The fourth decision is management.
Responses need more than a list. Status values such as New, In progress, Waiting, Closed, Sales proposal, and No action needed make follow-up easier. See View, Filter, and Update Response Status for the operational workflow.
The fifth decision is improvement.
After responses arrive, decide whether you need a one-time export or ongoing sync. Use CSV when you need the current data once. Use Google Sheets when the team needs a living table. See Export Responses to CSV or Sync Them to Google Sheets.
Start With the Smallest Useful Form
A first form should not try to do everything.
Most useful forms start close to this shape:
Name
Email address
Use-case-specific category or target
Message, answer, or selection
Data-use notice or consent
For a contact form, the use-case-specific field is inquiry category and message.
For a lead capture form, it is requested resource and company.
For a webinar registration form, it is webinar session and attendance intent.
For an event registration form, it is attendee count and attendance format.
For a job application form, it is role and work experience summary.
For a survey form, it is rating and reason.
The same field can serve different purposes. "Company" may be optional on a contact form, useful on a lead capture form, and necessary for a B2B event. "Phone" may be unnecessary for email-first support, but useful for urgent field events.
Do not copy a template blindly.
For each field, ask what the team will do with it after submission. If there is no answer, remove it or make it optional.
Use a Short Prompt First
In FORMLOVA, you do not need a perfect prompt.
Start with the use case.
Create a contact form with name, email, inquiry category, message, and data-use consent.
Create a lead capture form with name, email, company, requested resource, evaluation timeline, and data-use consent.
Create an event registration form with name, email, attendee count, attendance format, and cancellation policy consent.
Create a survey form with satisfaction rating, reason, improvement request, and permission for follow-up contact.
Then preview the draft and refine it.
Ask to make phone optional, reduce categories, add an auto-reply, or connect notifications. This is usually faster than trying to write the perfect long prompt before seeing the form.
Required Fields Should Support Reply, Triage, or Operations
Required fields create friction.
But missing data creates operational work.
Use three tests.
| Test | Good required fields | Usually optional fields |
|---|---|---|
| Needed for reply | Email, name | Phone |
| Needed for triage | Category, role, requested resource | Long notes, budget detail |
| Needed for operations | Attendee count, attendance format, consent | Extra comments, referral source |
Phone, role, budget, timeline, and long-answer fields should not be required by default.
But attendee count for an event, role for a job application, category for a contact form, and email for resource delivery are different. They directly support the workflow after submission.
The rule is simple:
make a field required only when the respondent can understand why the team needs it.
Labels, Help Text, and Errors Are Part of the Form
Field count matters, but completion depends on wording.
Labels, instructions, and error messages decide whether people can finish the form without hesitation.
W3C WAI's form guidance explains that user input should have labels or instructions, and that placeholder text alone can be hard to see. MDN's form validation guide explains built-in constraints such as required and email, plus how validation feedback works.
In practice:
Label: what this field is
Help text: how to answer
Error: how to fix the input
Weak:
Message
Enter text
Better:
Message
Please describe what you want to ask, what you need help with, or what you want us to confirm.
Weak error:
Invalid
Better error:
Enter a valid email address, for example name@example.com.
Do not make the user guess what went wrong.
Required and optional status should be visible. Examples should be short. Error messages should guide, not blame.
Design the Post-Submit Workflow
Publishing the form is not the end.
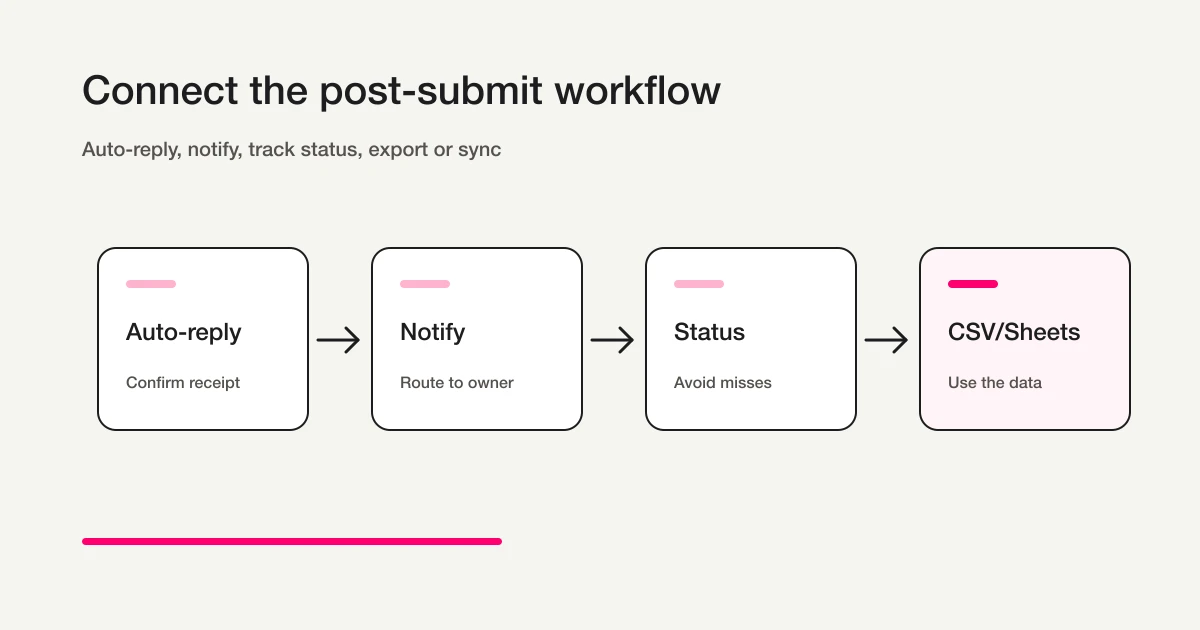
Most forms need four follow-up layers:
Auto-reply email
Internal notification
Response status
CSV or Google Sheets
If you want to see those layers as one workflow instead of separate features, read the FORMLOVA Form Automation Guide. It explains how submission triggers connect to notifications, auto-replies, sync destinations, and conditional branches.
For a contact form, route categories to the right owner.
For a lead capture form, separate resource delivery from sales follow-up.
For webinars and events, prepare confirmation emails, reminders, and attendee lists.
For hiring, track candidate stages.
For surveys, separate low scores, follow-up requests, and recurring themes.
When those layers are decided before launch, the form becomes an entry point for work rather than a passive collection page.
Recommended Reading Order
This article is the parent hub for the form creation cluster.
Read in this order:
- Start with the creation workflow: ChatGPT Form Builder Guide
- Pick the use case and fields: Form Field Examples Guide, Contact Form Template, Registration Form Guide, Reservation Form Guide, How to Make a Booking Form in Google Forms, Lead Capture Form Guide, Webinar Registration Form Guide, Event Registration Form Guide, Job Application Form Guide, Survey Form Guide, NPS Form Template, or Turn Site Design Hearings into Forms
- Reduce input friction and abandonment: Form Conversion Optimization Guide
- Add the response email: How to Set Up Form Auto-Reply Emails, Google Forms Auto-Reply Not Delivered if Google Forms delivery is failing, then Form Auto-Reply Email Examples
- Manage submissions: View, Filter, and Update Response Status
- Export or sync data: Export Responses to CSV or Sync Them to Google Sheets, or How to Export Google Forms Responses to CSV
- Turn the post-submit flow into automation: FORMLOVA Form Automation Guide
The links above use actual topic names instead of vague text such as "read more" or "click here."
That makes the reading path clearer: where the reader is, what the next article covers, and what decision it helps them make.
How to Use This Hub Page
This page is not meant to be read end to end every time.
Use it as a map.
First, choose the use case. Then move into the matching guide. After that, add the operational pieces: auto-reply, response status, and CSV or Google Sheets.
You do not need to read every article.
If you are building a contact form, the contact template, auto-reply guide, and response status guide may be enough. If you are building a survey, start with the survey guide and export/sync guide. If you are building a webinar registration flow, start with the webinar guide and then decide whether you need reminders, attendee exports, and follow-up.
A hub page is useful only when it reduces hesitation.
Its job is to help the reader choose the next article, not to inflate the site with another generic overview.
Launch Checklist
Before publishing, check the full workflow:
The form has one clear purpose.
Required fields are limited to reply, triage, or operations.
Phone is required only when there is a clear reason.
Categories use respondent-friendly wording.
Long-answer fields have short instructions.
The data-use purpose is visible before submission.
The auto-reply includes receipt and next steps.
Internal notification recipients are decided.
Response status values are decided.
CSV or Google Sheets columns are useful for the team.
A test submission confirms response, notification, and auto-reply behavior.
The important point is to test beyond the form screen.
A form can look clean while notification routing is missing.
Fields can be well designed while the auto-reply leaves the respondent uncertain.
Exports can exist while the team has not decided which columns matter.
Before launch, send a test response. Ideally, ask someone who did not build the form to complete it. Their hesitation will show you what to fix.
FAQ
What should I decide before creating a form?
Decide the use case and the post-submit action.
Do you need to reply, deliver a resource, manage attendees, evaluate candidates, or analyze feedback? Once the action is clear, the required fields become easier to choose.
Should a form have many fields?
No.
More fields can give the team more context, but they also increase respondent friction. Start with the fields needed for reply, triage, and operations. Make uncertain fields optional. Add fields later only when the same missing context appears repeatedly.
Does every form need an auto-reply email?
Most operational forms do.
Contact forms, lead capture forms, webinar registrations, event registrations, and job applications should usually acknowledge the submission. Surveys may not need an email if they are anonymous, but the completion screen should still explain what happened. If you need concrete post-submit wording, next-step examples, and tracking cautions, use the Form Thank You Page Guide.
Can this guide apply to Google Forms or other tools?
Yes.
Field design is tool-independent. The difference appears after submission. If you need auto-replies, routing, response status, exports, and CRM or Sheets handoff, design the operation around the form, not only the form itself.
Summary
Creating a form is not mainly about adding input fields.
It is about deciding who submits, what happens next, and how the team follows through.
Choose the form's job.
Keep required fields limited.
Add an auto-reply where the respondent expects confirmation.
Track response status.
Export or sync the data when the team needs it.
For repeatable forms, finish by using the FORMLOVA Form Automation Guide to standardize notifications, auto-replies, statuses, and external handoff as one workflow.
FORMLOVA lets you start from a short prompt, preview the draft, and add the workflow one layer at a time.
Disclosure and Verification
This is a parent guide for teams creating forms in FORMLOVA. I work on FORMLOVA, so the workflow examples use the product directly. I reviewed form design, accessibility, input experience, and search-friendly page structure on April 28, 2026. Treat this as product and form-design guidance, not legal advice.
Related Articles
- Survey Form Guide -- Design Questions, Collect Responses, and Turn Results Into Follow-Up
- Contact Form Template -- Fields, Privacy Notice, Auto-Reply, and Routing Structure
- Form Optimization Guide -- Reduce Form Abandonment and Improve Completion
- ChatGPT Form Builder and Claude Form Builder Guide -- Create a Private Draft From One Prompt
- Form Auto-Reply and Confirmation Email Examples -- Templates for Contact Forms, Downloads, Webinars, and Applications
- View, Filter, and Update Response Status with FORMLOVA
- Export Google Forms Responses to CSV or Sync Form Data to Google Sheets
- Webinar Registration Management: Signup, Reminders, Attendee Lists, and Follow-Up
- Turn Site Design Hearings into Forms -- Auto-generate Figma Wireframes from Responses
- How to Build a Job Application Form with FORMLOVA -- Fields, Auto-Replies, and Candidate Status